1. Quick Answer: How Do You Stain Zirconia Crowns?
Staining zirconia crowns involves preparing the restoration, applying compatible ceramic stains to selected areas, and firing the restoration according to the stain manufacturer's recommended program.
With BAOT Aurora, a standardized staining workflow for shade A2 uses five selected stain colors — Shade 1, Blue Haze, Milk White, Coffee, and Light Lavender — to create different color effects across the crown.
The process begins with crown preparation and paste mixing, by a thin glaze base application and controlled stain placement. The restoration is then fired in a single firing cycle according to the recommended program.
BAOT Aurora Standardized Staining Workflow:
(Taking shade A2 as an example)
1. Sandblast, clean, and thoroughly dry the zirconia crown.
2. Prepare the glaze paste and selected stain colors.
3. Apply a thin glaze layer as the base.
4. Apply Shade 1, Blue Haze, Milk White, Coffee, and Light Lavender to their designated areas.
5. Fire according to the recommended firing program.
6. Evaluate the final shade and surface appearance.
This standardized approach is designed to make the staining process more consistent and efficient while creating a natural-looking color effect.
2. Key Takeaways
- A standardized workflow: BAOT Aurora uses a defined sequence of preparation, paste mixing, color application, and firing.
- Five selected stain colors: Shade 1, Blue Haze, Milk White, Coffee, and Light Lavender each serve a different characterization purpose.
- Controlled color placement: Different areas of the crown are treated individually to build color depth and visual details.
- A glaze base layer: A thin glaze layer is applied before staining as part of the Aurora standardized workflow.
- Single-firing process: The complete staining procedure is designed to be completed in one firing cycle, supporting workflow efficiency.
- Consistent application: Following the recommended sequence and application method helps reduce unnecessary variation between restorations.
3. Understanding Standardized Zirconia Crown Staining
3.1 What Is External Staining of Zirconia Crowns?
External staining is a ceramic characterization technique in which stain materials are applied to the surface of a zirconia restoration to adjust its color and create localized details.
Rather than relying only on the original zirconia block shade, technicians can use different stain colors to refine specific areas of the crown.
These may include:
- Cervical color intensity.
- Mesial and distal incisal effects.
- Developmental depressions between the lobes.
- Main body characterization.
- Incisal edge details.
The objective is to create a more individualized appearance through controlled color application.
3.2 What Is Standardized Staining?
Standardized staining refers to following a defined procedure with specified materials, color selections, application areas, and firing conditions.
Instead of selecting colors and application methods independently for every restoration, technicians follow an established sequence.
In this guide, using shade A2 as an example, BAOT Aurora's standardized staining tutorial uses five selected stain colors and a single-firing workflow.
This provides a reference procedure for applying color to designated areas of the crown.
3.3 Staining vs. Glazing: What Is the Difference?
Staining and glazing are related ceramic finishing processes, but they have different purposes.
| Process | Main Purpose | Role in the Aurora Standardized Workflow |
| Staining | Adjust color and create localized characterization | Creates cervical, incisal, and anatomical color effects |
| Glazing | Primarily creates or adjusts the surface finish and gloss | A thin glaze layer is applied first as the base layer in this specific workflow |
In this standardized procedure, glaze paste is prepared with glaze liquid and applied as a thin base before the colored stains.
This base layer helps seal surface micropores and supports staining stability and control.
4. Materials and Preparation Before Staining
Before starting, prepare the zirconia crown, staining materials, and necessary tools.
4.1 Materials and Equipment Checklist
Restoration:
- Prepared zirconia crown.
Aurora materials:
- Glaze paste.
- Glaze liquid.
- Shade 1.
- Blue Haze.
- Milk White.
- Coffee.
- Light Lavender.
Tools and equipment:
- Non-metal spatula.
- Suitable staining brushes.
- Sandblasting equipment.
- Steam cleaner or ultrasonic cleaner.
- Zirconia-compatible ceramic furnace.
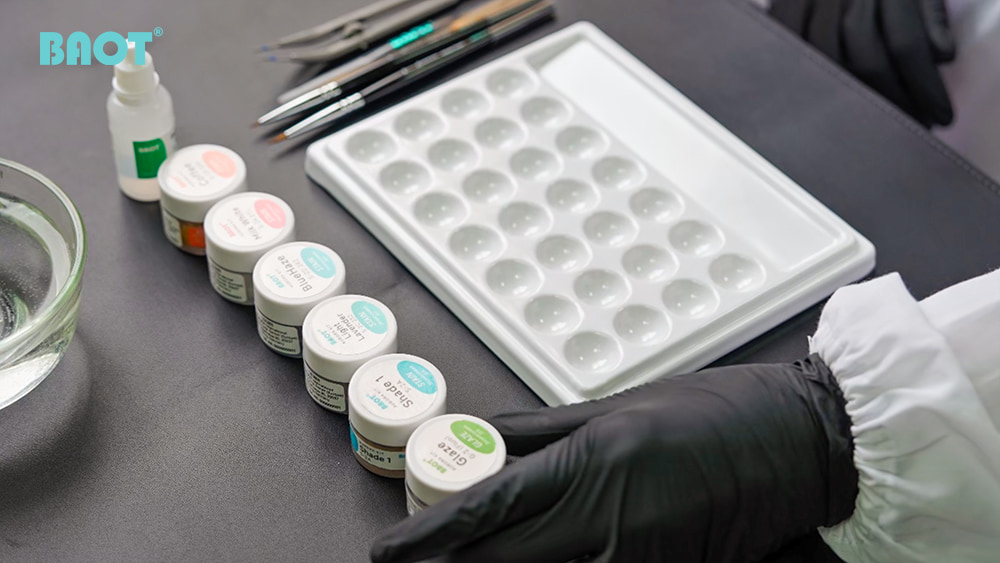
4.2 Prepare the Staining Pastes
Before application, prepare the materials according to the recommended consistency.
1. Mix the paste thoroughly using a non-metal spatula until a uniform consistency.
2. Mix the glaze paste with glaze liquid until the desired working viscosity is reached. The recommended ratio is 3:1 (paste: liquid).
3. Prepare the selected stain colors: Shade 1, Light Lavender, Blue Haze, Milk White, and Coffee.
4. Dilute individual stains with glaze liquid when necessary, according to the required application consistency.
Important: Adjust the consistency according to the product instructions and the intended application.
5. How to Stain Zirconia Crowns with BAOT Aurora: Step by Step
The following procedure follows BAOT Aurora's standardized staining tutorial.
Step 1: Crown Preparation
Proper surface preparation is the starting point for a consistent staining process.
1. Sandblast the crown.
Sandblast the zirconia crown according to the recommended surface preparation procedure.
2. Clean the surface.
Use a steam cleaner or ultrasonic cleaner to remove surface dust, debris, and other contaminants.
3. Dry thoroughly.
Make sure the crown is completely dry before proceeding to the next step.
4. Prepare the staining materials and tools.
Arrange the Aurora stain colors, glaze paste, glaze liquid, brushes, and other necessary tools in advance.
Practical tip: A clean and properly prepared surface helps provide a suitable foundation for the subsequent application steps.
Step 2: Paste Preparation
Prepare the Aurora materials before applying them to the crown.
1. Mix the paste.
Use a non-metal spatula to mix the paste thoroughly until it reaches a uniform consistency.
2. Prepare the glaze base.
Mix the glaze paste with glaze liquid until the desired working viscosity is achieved.
3. Select the five stain colors.
Prepare the following colors:
- Shade 1
- Light Lavender
- Blue Haze
- Milk White
- Coffee
4. Adjust the consistency when needed.
Dilute the selected stains with glaze liquid if necessary to achieve the desired application consistency.
Practical tip: Proper paste preparation helps maintain consistent handling during application. Avoid using excessively thick or unevenly mixed paste.
Step 3: Apply the Standardized Staining Sequence
3.1 Apply a Thin Glaze Base
Apply a thin glaze layer as the base before adding colored stains.
The glaze layer serves as a base that helps seal surface micropores and improve staining stability and control.
Keep the application thin and even.
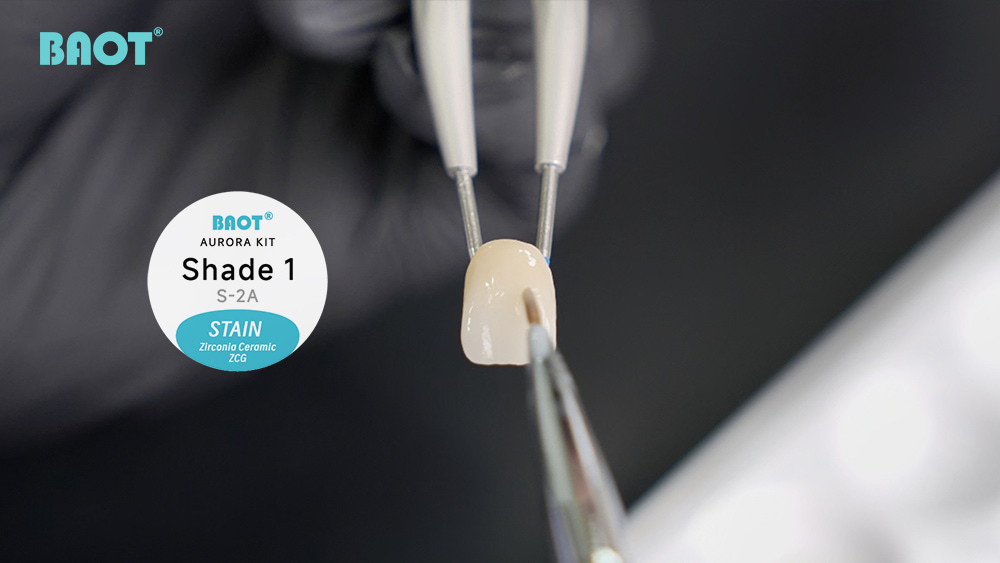
3.2 Apply Shade 1 to the Cervical Third
Apply Shade 1 to the cervical one-third of the crown and blend it gradually toward the incisal area.
This step establishes the main cervical color effect and helps create a transition between different regions of the restoration.
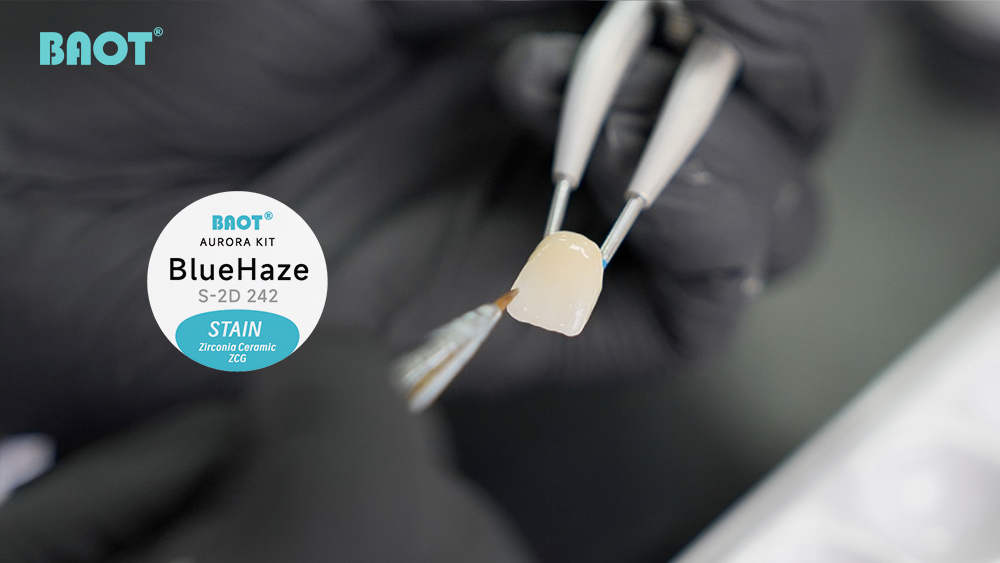
3.3 Apply Blue Haze to the Mesial and Distal Incisal Aspects
Apply Blue Haze to the mesial and distal incisal aspects.
This color is used to enhance the translucency effect in these areas.
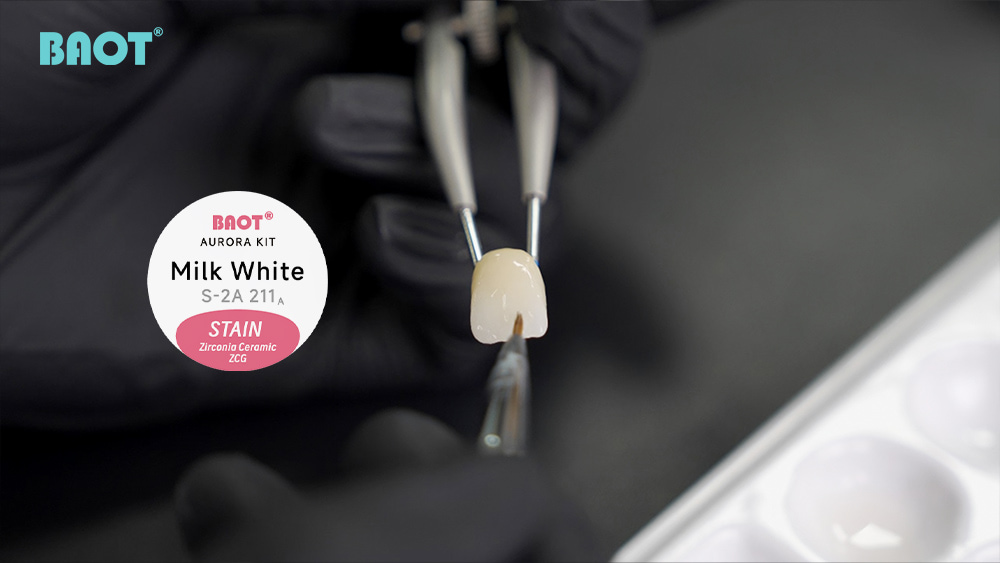
3.4 Use Milk White to Highlight the Developmental Depressions
Apply Milk White to the developmental depressions between the lobes.
This creates localized light-colored details that help define the anatomical characterization.
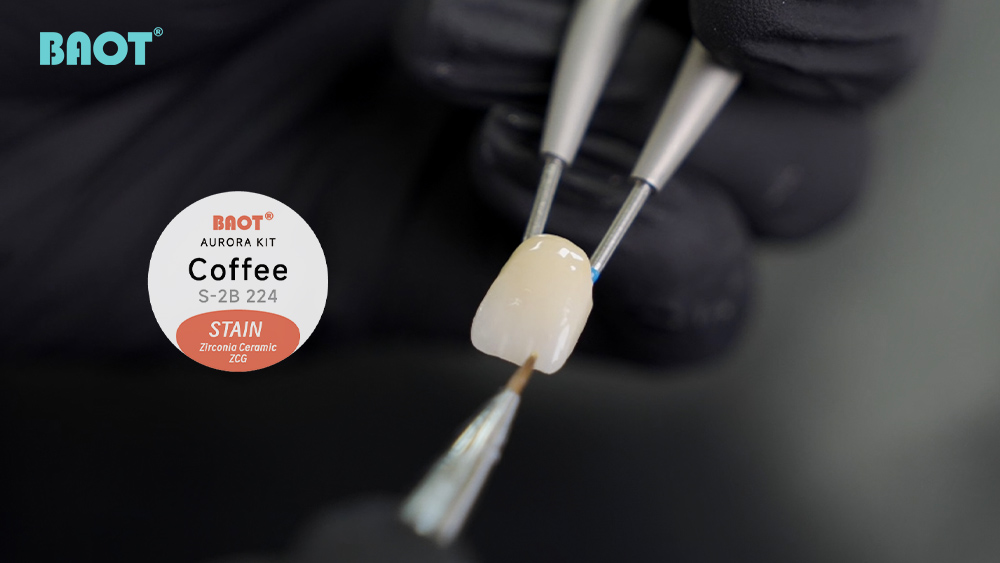
3.5 Use Coffee to Define the Main Body of the Lobes
Apply Coffee to define the main body of the lobes.
Use controlled application to emphasize the intended anatomical details without creating excessive color intensity.
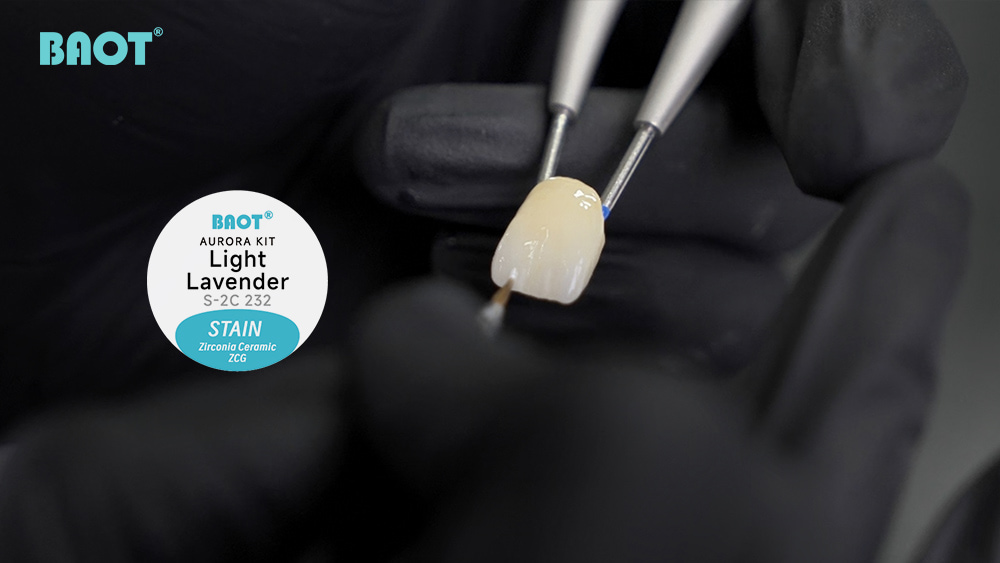
3.6 Use Light Lavender to Enhance the Lobes
Apply Light Lavender to enhance the lobes and refine the color characterization.
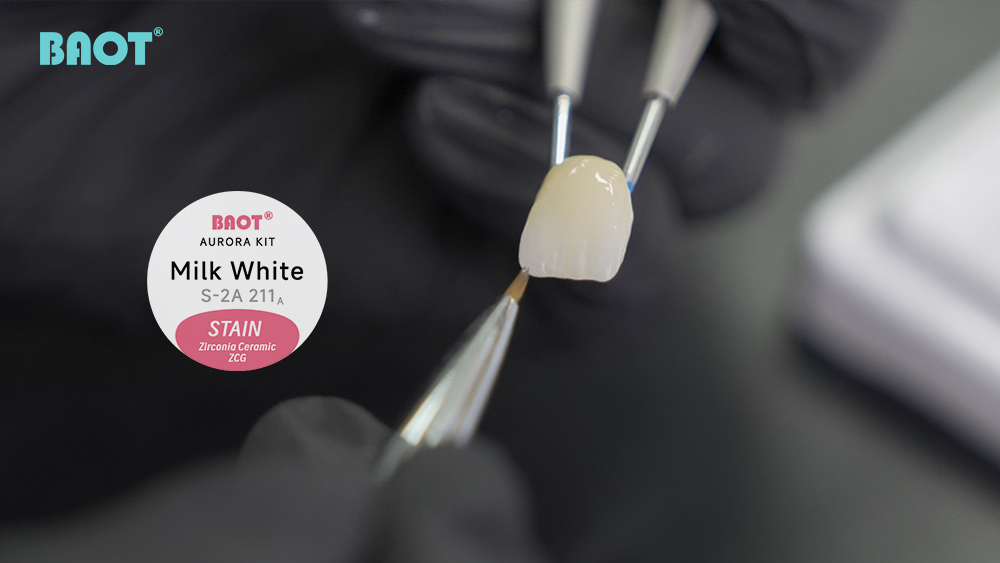
3.7 Apply Milk White Along the Incisal Edge
Finally, apply Milk White along the incisal edge to create a halo effect.
Keep the application controlled and consistent with the intended incisal appearance.
3.8 Aurora Standardized Stain Color and Application Guide
The following table summarizes the five selected colors and their corresponding application areas.
| Stain Color | Application Area | Intended Effect |
| Shade 1 | Cervical 1/3, blended toward the incisal area | Establishes the cervical color effect |
| Blue Haze | Mesial and distal incisal aspects | Enhances the translucency effect |
| Milk White | Developmental depressions between the lobes | Highlights anatomical details |
| Coffee | Main body of the lobes | Defines the lobe structure |
| Light Lavender | Lobes | Enhances lobe characterization |
| Milk White | Along the incisal edge | Creates a halo effect |
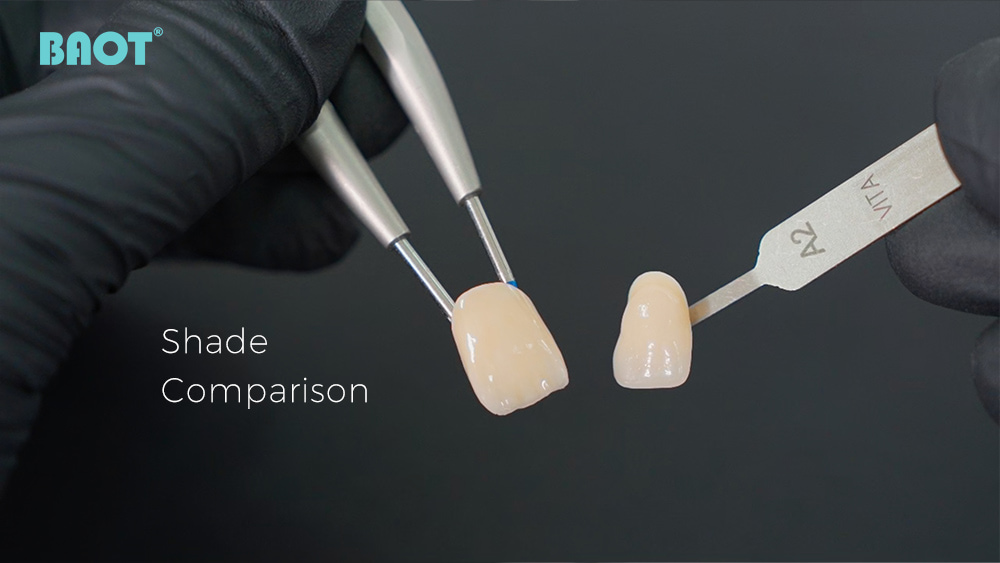
3.9 Check the Shade Before Firing
After completing the staining application, inspect the crown and compare the result with the intended shade reference.
Check the distribution of color and the transitions between different areas.
If there is any deviation in the shade, make adjustments until the result matches the target shade.
Step 4: Firing
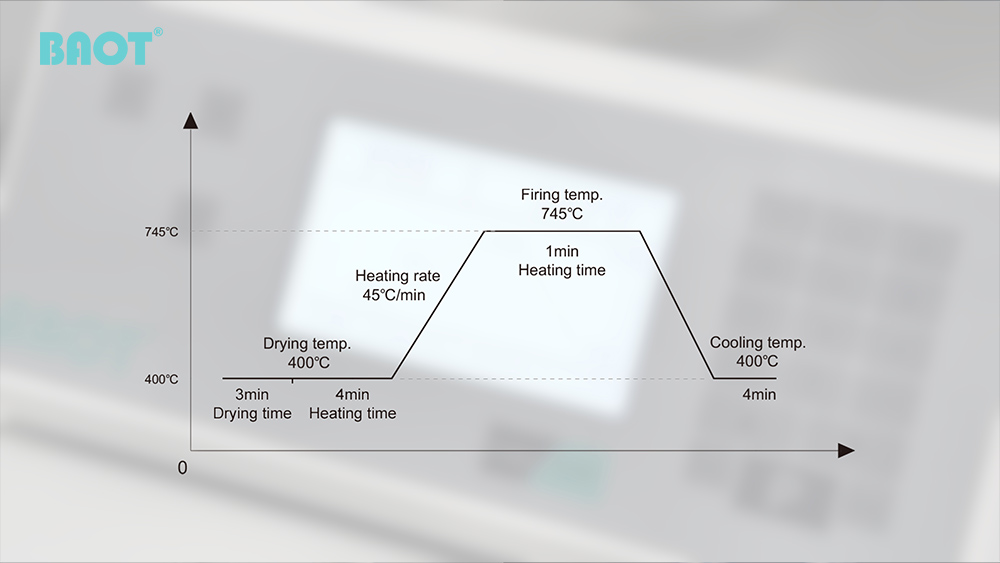
After completing the staining application, fire the restoration according to the recommended Aurora firing program.
The standardized Aurora procedure is designed to be completed in a single firing, helping simplify the workflow.
Stain / Glaze
| Drying temp. | Drying time | Heating time | Heating rate | Firing temp. | Holding time | Cooling time | Cooling temp. |
| 400℃ | 3 mins | 4 mins | 45℃/min | 730-950℃ | 1 min | 4 mins | 400℃ |
Step 5: Final Result and Evaluation
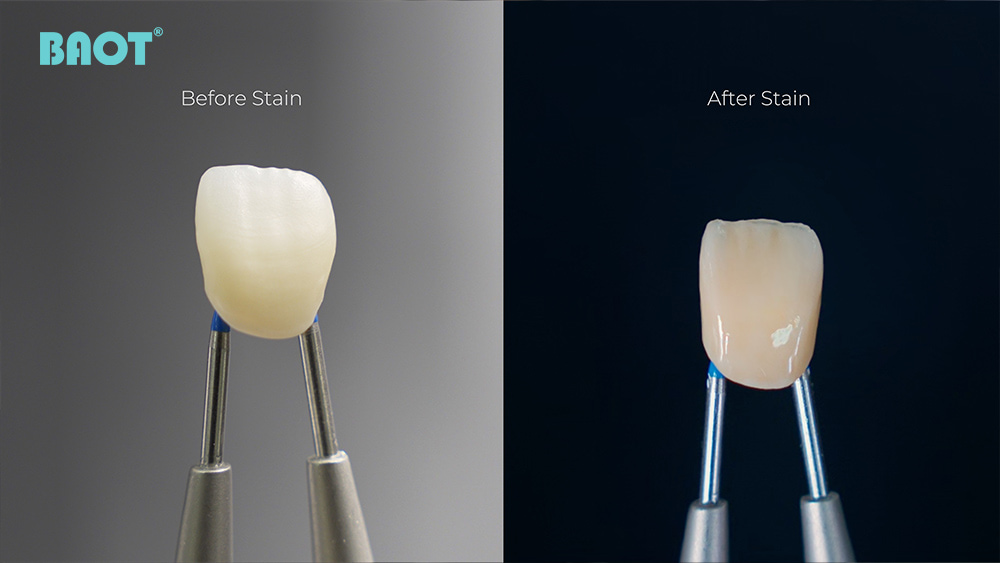
After firing and cooling according to the recommended procedure, inspect the finished crown.
Evaluate:
- Overall shade appearance.
- Cervical-to-incisal color transition.
- Mesial and distal incisal translucency effects.
- Definition of the developmental depressions and lobes.
- Incisal halo effect.
- Surface finish and gloss.
Following the standardized color selection and application sequence helps establish a repeatable reference for the staining workflow.
6. Frequently Asked Questions About Zirconia Crown Staining
Q: Can you stain zirconia crowns after sintering?
A: Yes. External staining is commonly used to characterize sintered zirconia restorations. It allows dental technicians to add color details and refine the appearance of the restoration according to the desired shade and esthetic requirements.
Q: How many colors are used in the BAOT Aurora standardized staining process?
A: The BAOT Aurora standardized staining tutorial uses five stain shades: Shade 1, Blue Haze, Milk White, Coffee, and Light Lavender. Each color serves a specific purpose in creating cervical, incisal, and surface details.
Q: Why is a thin glaze layer applied before staining?
A: A thin glaze layer is applied as the base before the individual stains. This layer helps seal surface micropores and improve staining stability and control.
Q: What is the purpose of Blue Haze in zirconia crown staining?
A: Blue Haze is applied to the mesial and distal incisal areas to enhance the translucent appearance of the restoration and create a more natural-looking incisal effect.
Q: Why is Milk White applied twice?
A: Milk White is used in two different areas for different effects. It is first applied to the developmental depressions between the lobes to highlight surface details, then along the incisal edge to create a halo effect.
Q: What are Coffee and Light Lavender used for?
A: Coffee is used to define the main body of the lobes, while Light Lavender enhances the lobes and adds further color dimension to the restoration.
Q: Does the BAOT Aurora standardized staining process require multiple firings?
A: The BAOT Aurora standardized staining tutorial demonstrates a single-firing workflow for the staining process. Follow the recommended firing program for the materials being used.
Q: What firing temperature should be used for zirconia crown staining?
A: The firing temperature depends on the staining materials and the recommended firing program. Always refer to the corresponding BAOT Aurora instructions for the appropriate firing parameters rather than applying a general temperature to all zirconia staining procedures.
Q: Can the same staining technique be used for different zirconia shades?
A: The five-color application method provides a reference for external characterization. However, the final appearance may vary depending on the original zirconia shade, translucency, and restoration design. Adjustments may be necessary to achieve the intended result.
Q: Is staining the same as glazing?
A: No. Staining and glazing serve different purposes in dental restoration finishing. Staining adds color characterization and surface details, while glazing creates a surface finish. In the BAOT Aurora standardized workflow, a thin glaze layer is applied first as a base before the individual stains.
Q: Conclusion: Achieve Natural Zirconia Esthetics with a Standardized Staining Process
A: Achieving natural-looking zirconia crowns requires more than selecting the right stain colors. The application areas, color transitions, layering technique, and firing process all contribute to the final appearance.
The BAOT Aurora standardized staining tutorial provides a practical five-color application method, guiding dental technicians through each stage—from crown preparation and paste mixing to color application and final firing.
By following a clear staining sequence and understanding the role of each color, technicians can approach zirconia crown characterization with greater consistency and control.
Author:
BAOT Dental Materials Technical Team
Technical Reviewer:
Dental Materials Application Specialist
Last Updated:
October 2026

NO.12 Building, Yujing industry Zone, 106 Qihao Road, Torch Development District, Zhongshan City, GuangDong Province
separarea andocării :+86-(0)760-8789 3825
linie de serviciu 1 :+86-(0)760-8789 6339
linie de serviciu 2 :+86 138 2393 9676
e-mail : mike.zhang@baot.biz


© 2026 BAOT Biological Technology Co., Ltd toate drepturile rezervate.


 blog

